latest posts
From the Blog
Notes that are useful to me — and hopefully to you too.
// WHMCS
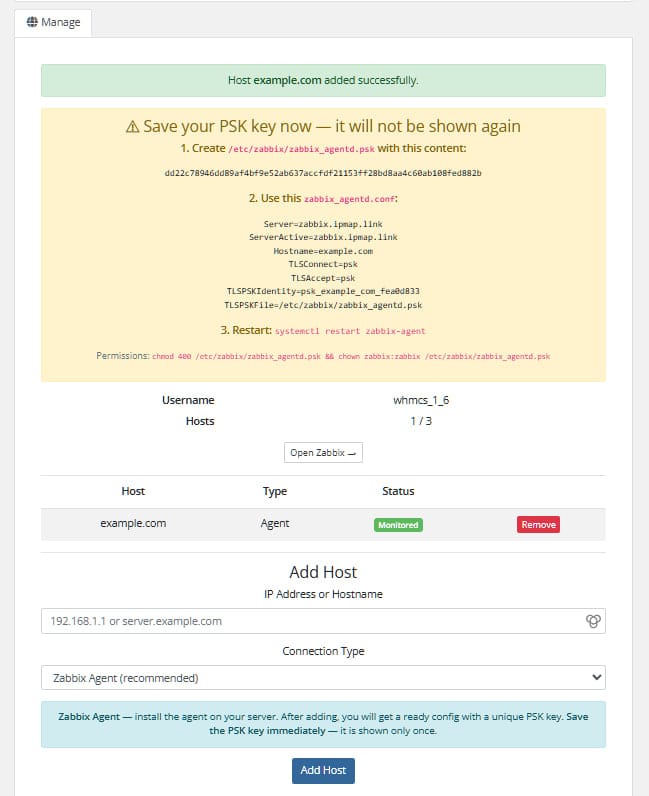
Free Zabbix module for WHMCS
WHMCS provisioning module for Zabbix — sell network monitoring as a service. Automates account creation, suspension, ...
// WHMCS
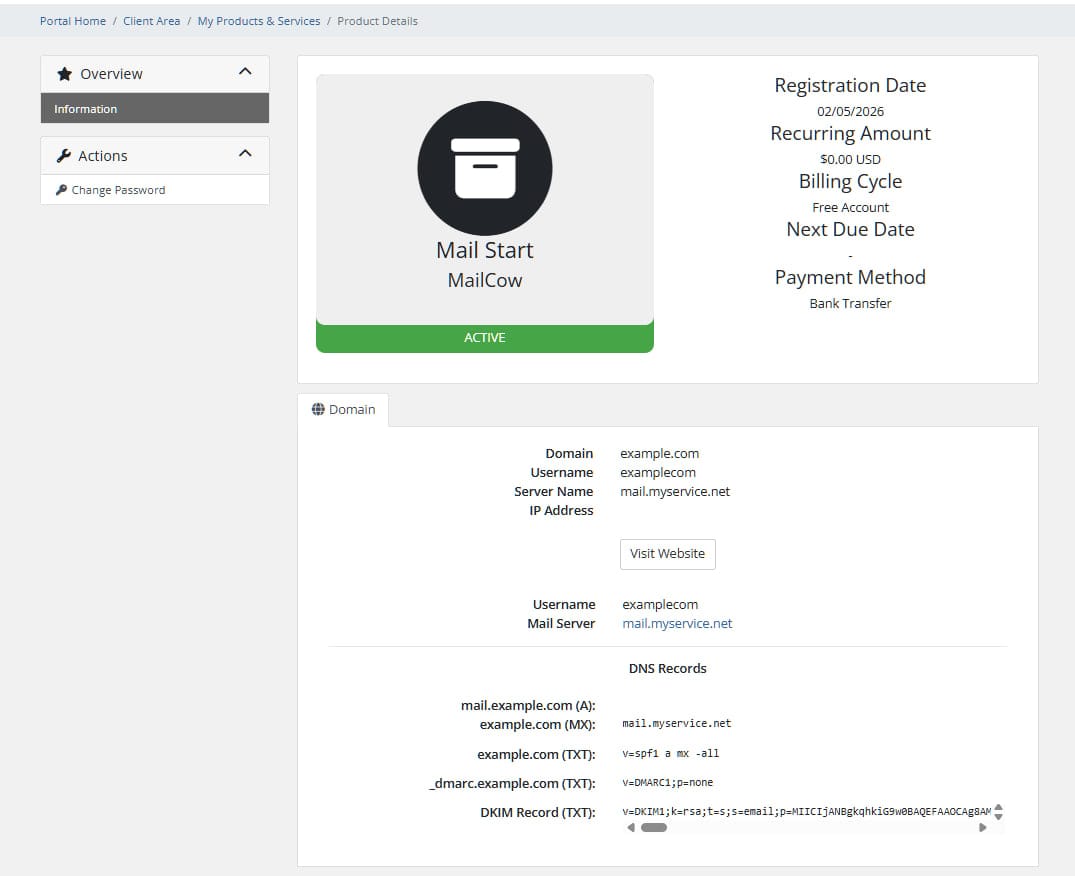
Free MailCow module for WHMCS
WHMCS provisioning module for Mailcow — automates creation, suspension, termination and password changes for email do...

// Hack • Linux
Two global vulnerabilities of April 2026: "Copy Fail" in the Linux kernel and authentication bypass in cPanel/WHM
At the end of April 2026, two critical vulnerabilities surfaced simultaneously, affecting millions of servers around ...

// Linux • Scaner • ClamAV
Scan your website for viruses using maldet + ClamAV
The most effective way is to install LMD (Maldet) and integrate it with the ClamAV engine to speed up scanning.
Belo...

// PHP • Linux • ioncube
Install ionCube Loader in Linux Server from PHP
Use command from download:
wget http://downloads3.ioncube.com/loader_downloads/ioncube_loaders_lin_x86-64.tar.gz
Un...

// Linux
How to set correct permissions on files and directories?
Sometimes you need to recursively set permissions on files and folders, but we have a lot of files and folders and it...